
ASSIGMENT - design a 3D mold, machine it, and cast parts from it
3D DESIGN {WHAT WILL I MAKE?}
After much deliberation and consideration, I felt I would keep with my sand dollar design, the comb I had to 3d print to be precise, I had to modify a few elements as the milling machine bit is 3mm square, so most of the detail would be too small to mill into the wax.
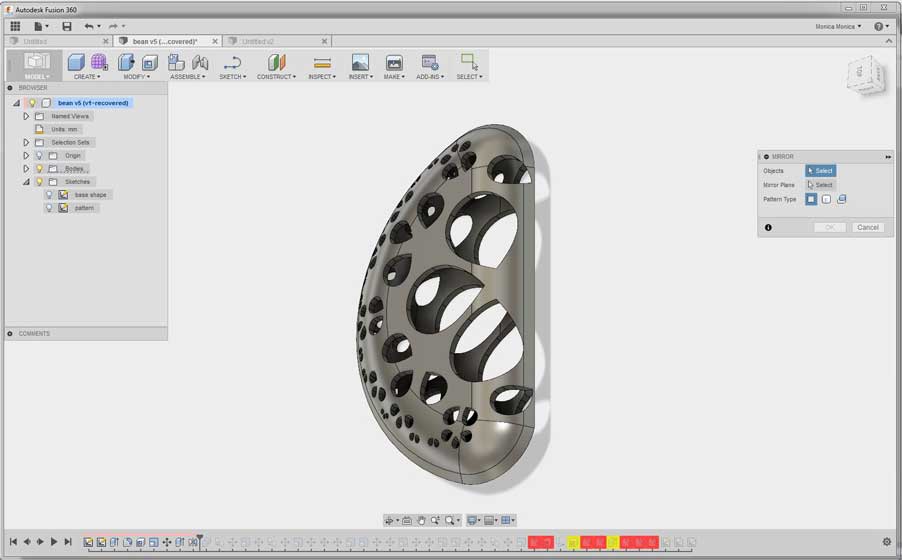
I went into my fusion 360 file and deleted some of the pattern and scaled the others up slightly. This was really easy to do as Fusion 360 has the history scrool bar, so to change the sketch and see the final outcome without having to redo all the steps was great.

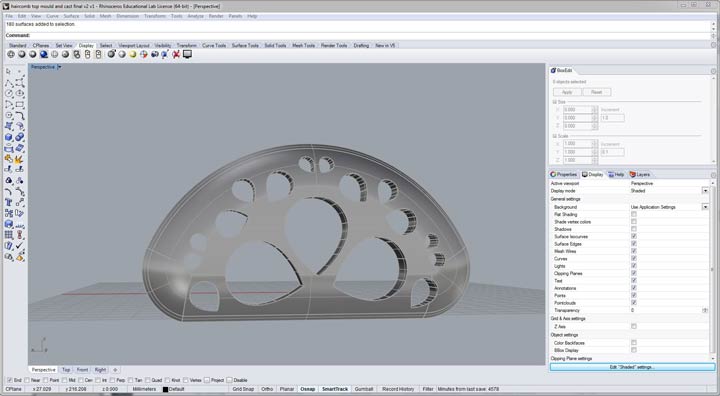
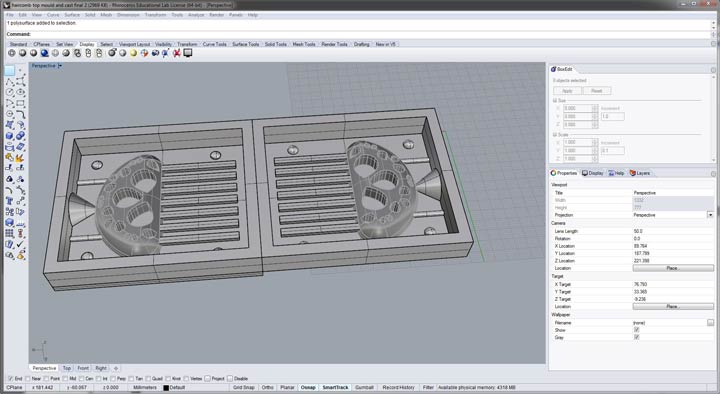
Next I imported the file, .iges, which luckily works great between the two programmes into RHINO. Here I added the teeth of the comb and set up the mill properties for the postive wax mold, including small domes to ensure the mold would line up easily. I added a pouring hole for whatever I would cast in as well as breather holes. Saved as STL.
TO THE MILLING {A COMB IN THE MAKING}
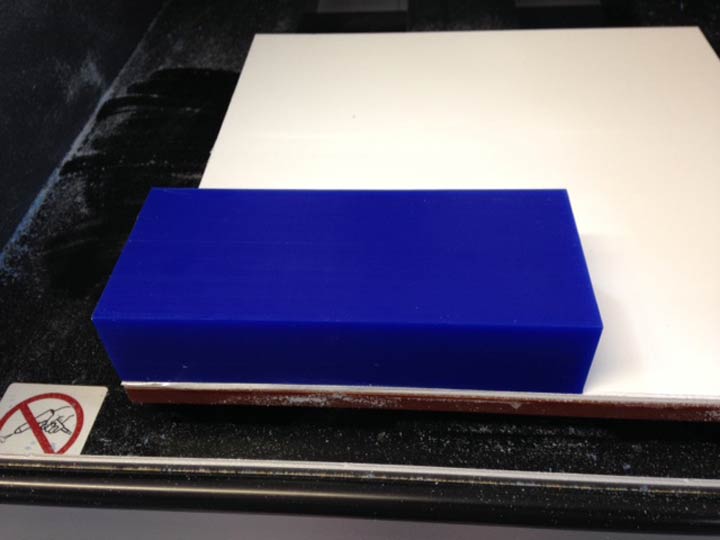
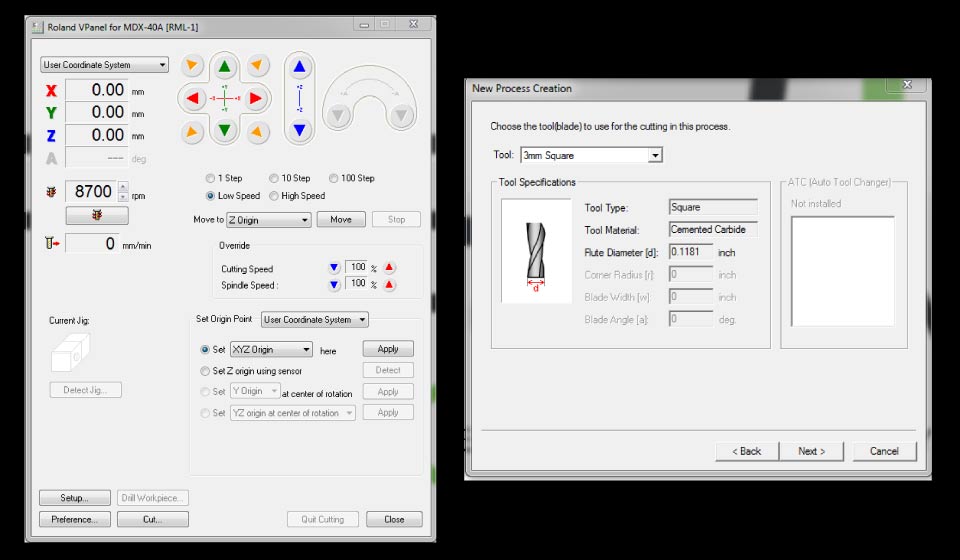
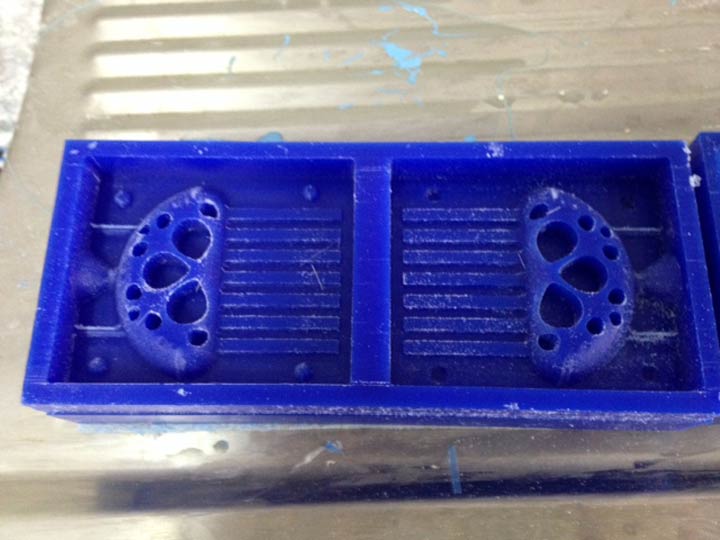
Then to the millling. We milled our wax on the Roland MDX-40A, with, as previously mentioned, a 3mm square bit.
I double side taped the bottom of the wax onto the bed of the machine.
Using windows OS I then opened the software; we used modela player 4 and the Roland Vpanel for MDX-40A.
Roland Vpanel is used to zero the machine whilst the modela player 4 loads the design and sets the machines various functions.
I loaded the design file and zeroed the machine using the up/down/left/right functions, choosing the xy position first, on high speed, then the z position on low, and back again to the xy position for exact placement and applied the settings.
I started with surfacing the wax, this simply ensures an even start off point.
The only settings I chnged was to set the bit to 3mm square as the automotic setting is for 6mm.
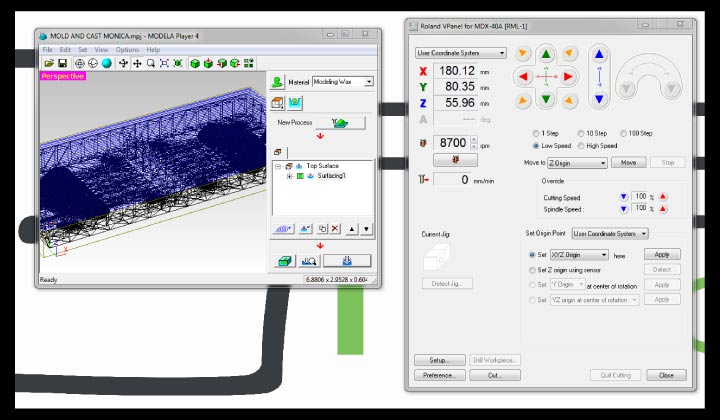
After the surfacing was done I applied the zero to the machine again in Roland Vplayer, and then set up the model player 4 to do a rough cut. This does a rough version of the positive cast, again I only changed the bit settings to 3mm.

Finally, the rough cut took quite some time, I again applied the zero to the machine and set up the modela player 4 to run a finishing cut. (drill bit size).

This took even longer, with the whole process for the milling of the positive cast taking approximately 8 hrs. Unfortunately something in my design had gone wrong and I was left with a comb sans teeth!!!!
I plan to still make the silicon mold and see what I can do with it.
But I did fix the problem and redid the entire setup again. So now I have a toothed comb ready to cast.
CASTING {THE NEGATIVE MOLD}
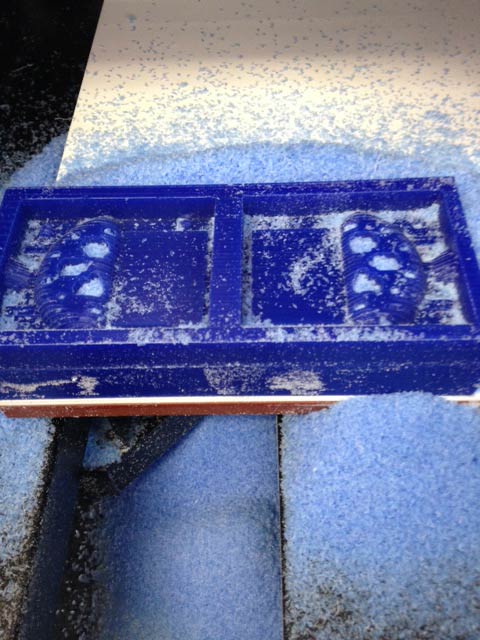
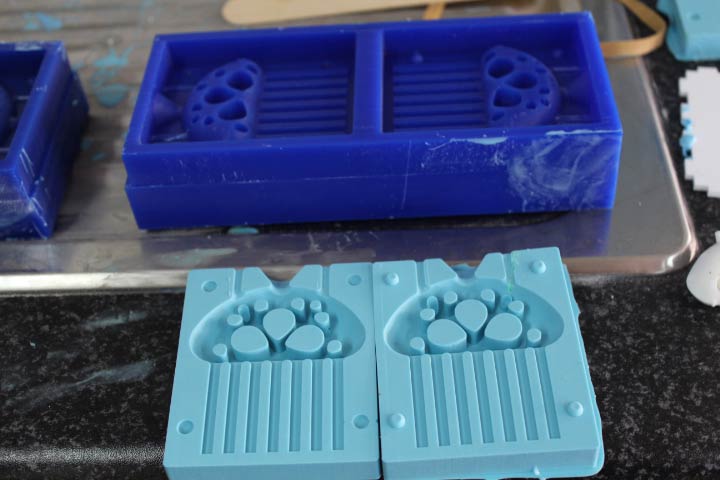
For the negative mold I used OOMOO 25.
Instructions follow that both A and B should be thoroughly mixed prior to combining, which should be done equal part A poured into part B. Apparently it mixes in better that way around. This mixture should then be stirred well for about 3mm whilst scraping the edges and bottom, until no streaks of colour can be seen.
I poured the mix over my molds, this hould be done from one area, not too much moving around, as that will cause bubbles! Because I have small parts that need to be filled I poured over that area and banged it on the table in hopes of it running into ther gaps properly, I hope it works.
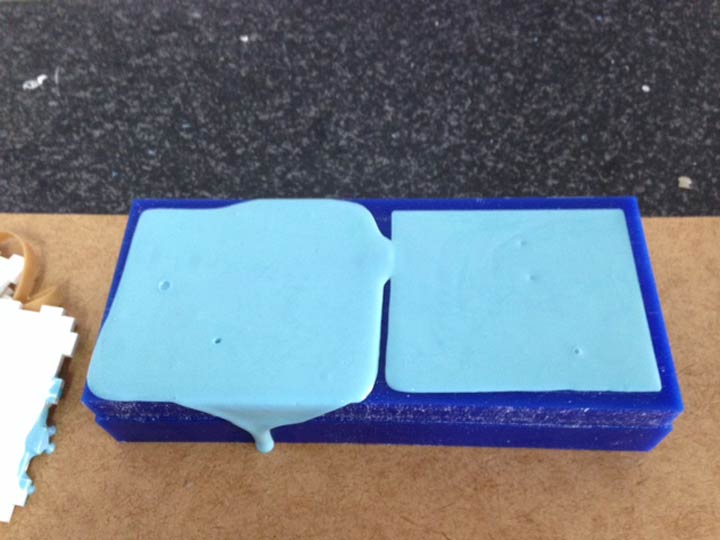
The curing time is 75min, but I let mine stand about 3hrs. The OOMOO set perfectly, but as I suspected there were holes that did not fill, I will have to try syringe the OOMOO in to those areas if I have time.
CASTING {THE POSITIVE MOLD}
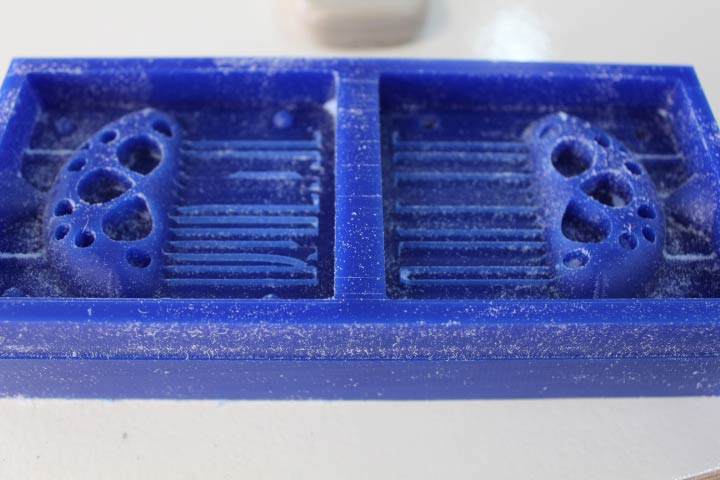
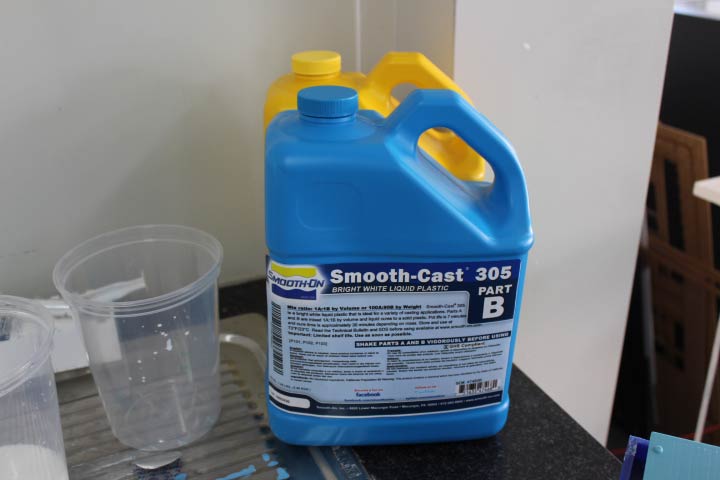
Next I cast the final, positive, into the toothed comb mold. I used smooth cast 305, first shaken vigurouly and then equal parts A and B poured together and mixed. It hardens after about 5 min, so being quick was of the essence.
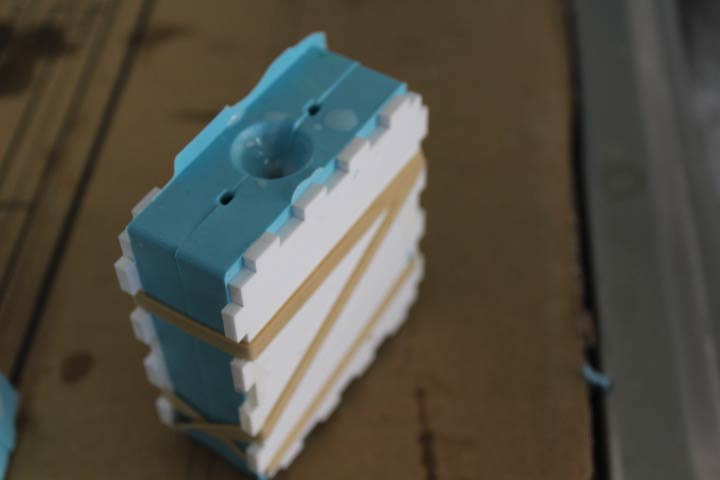
I used perspex offcuts to stabilize my silicon mold and tied it tight with an elastic band, and poured the liquid plastic into the mold using a syringe.
After an 1hr cure time I was ready to see the results...
.jpg)
.jpg)
I am really happy with the results, but will have to look at recasting as the teeth did not line up exactly and it is difficult to get into my hair.
Downlad my working files HERE.